Showing posts with label Spring. Show all posts

Wednesday, October 9, 2013

DIY Garden Globes

Yes, I am still posting about garden stuff even though its October. In my defense it was sunny and 70s here in Minnesota yesterday. Im in denial that its autumn.
Today's project is a Pinterest Win!!! I saw a few tutorials on how to make your own glitter Christmas ornaments and I thought, well, why not turn that into garden art?!
I had purchased some plastic and glass ornaments at Michael's at the end of last season. I had grand intentions of making something cool out of them, but as a lot of projects go, I never got to it. I decided to use them for the garden instead.


BLOG Globes1 
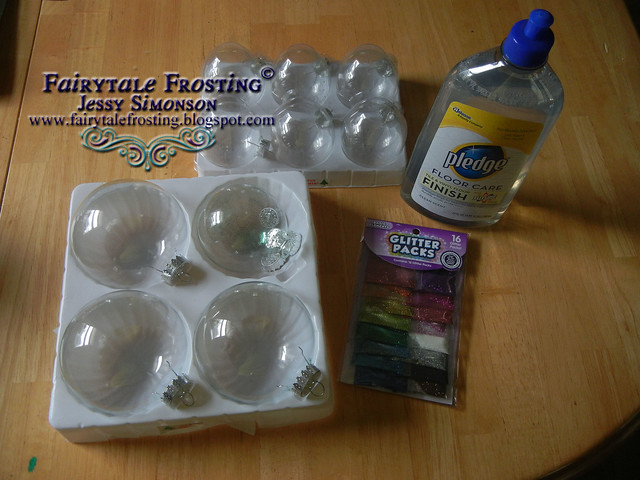
Supplies you will need:
Variety of glass and/or plastic ornaments
Glitter
Pledge Floor Care Finish Cleaner (I was only able to find this at Wal-Mart)

Supplies not pictured:
Wood dowels that will fit inside your ornaments
Floral wire

To make the glitter globes is really easy. Pour a little bit of the floor care solution into the ornament. Pour a bit of glitter into the ornament. Cover the opening, swish and swirl around until the globe is covered. Add more glitter if needed. Do not add more floor cleaner though, it will make the glitter clumpy.
Set the ornament back in the try to dry. Repeat with all of them. I let mine dry over night.

BLOG Globes2  
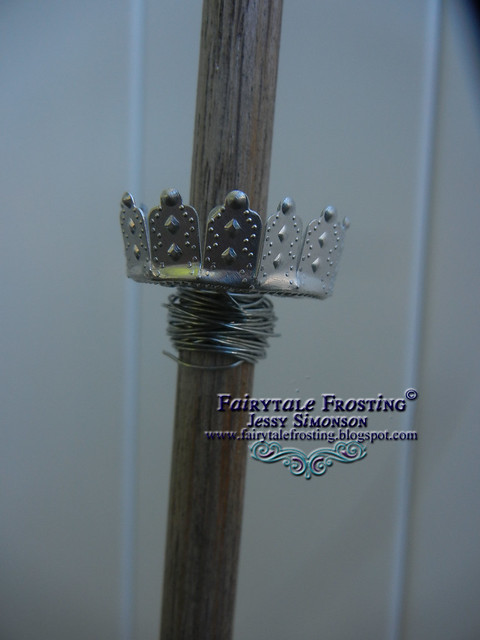
To make them into garden stakes, I removed the hanger hooks and kept the cover piece for each ornament. I had to use my Big Bite Hole Punch to make the openings wider to slide the dowel through. I wrapped floral wire around the dowel, thick enough so the ornament piece wouldn't slide down past it.
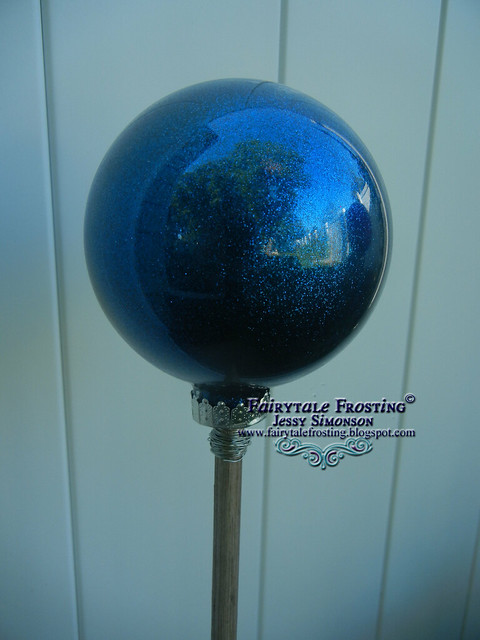
Once secure, slide your ornament onto the dowel and into the cover. The dowel should hit the top of the ornament for it to sit right. Don't worry, I didn't have any problem with it ruining the glitter finish inside.
You may need to adjust where the wire/cover sit on the dowel.
Once this step is complete, insert your dowel into the ground and......

BLOG Globes3  
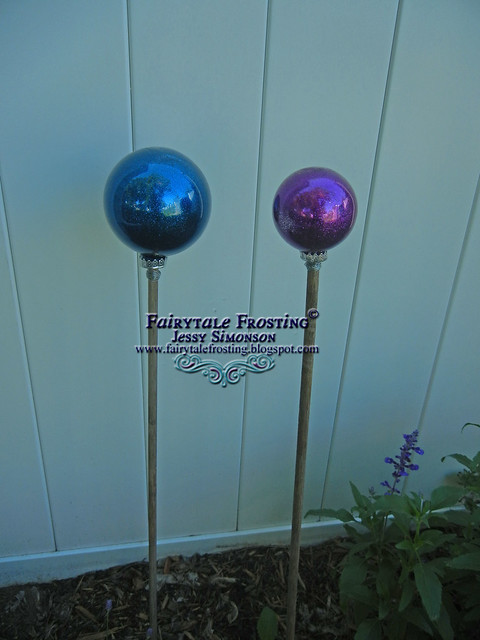
VIOLA!!! A beautiful glittery garden globe stake!

BLOG Globes5 
Pretty fun huh?

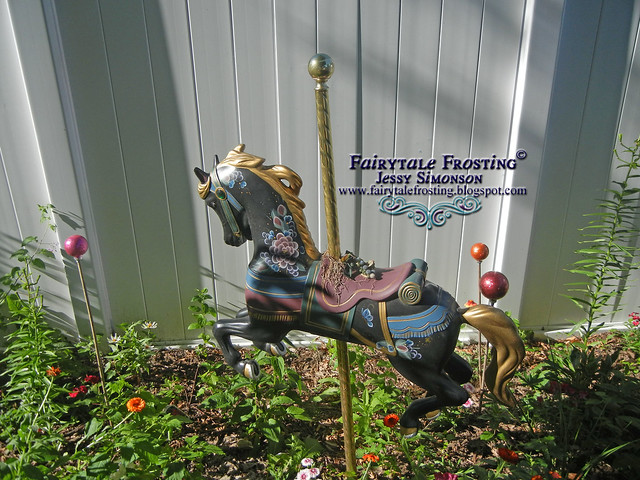
I am into quirky garden art so I made a few to go around my carousel horse too!
What kind of fun garden art did you make this season?

   photo BlogSignaturecopy_zps136f6d8e.jpg

Wednesday, October 2, 2013

Mushroom Garden Art

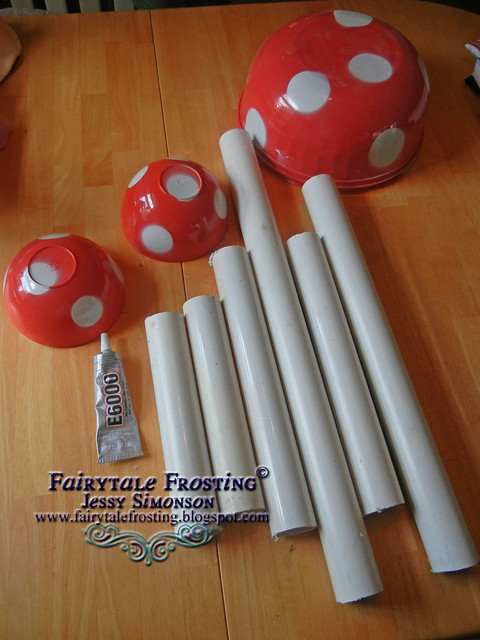
Mushrooms have been really popular this season. Or maybe its just me. I dont know, but I decided that I needed some in my yard. I got this crazy idea to use up some left over PVC pipe I had in the garage and some Dollar Store bowls I picked up. Check out how easy it is to make your own garden mushrooms!

All you need are some plastic bowls, PVC pipe, spray paint, and heavy duty glue. I used E6000.
I picked up some red bowls at the Dollar Store and spray painted white circles on them. I simply used my Cricut to cut a circle and then used the negative paper as a stencil.

  BLOG Mushrooms 2  
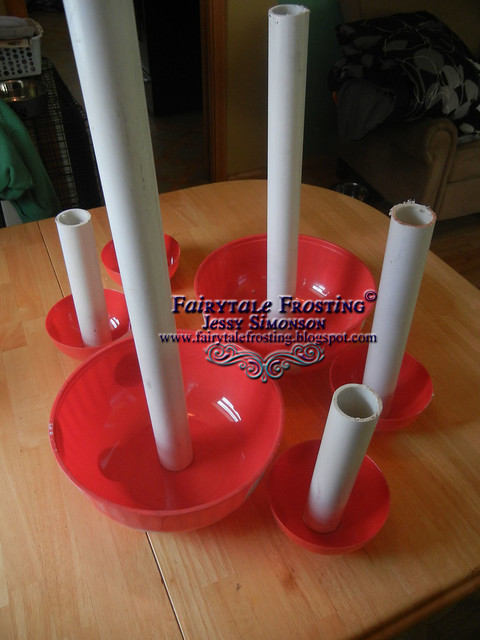
Once the bowls are painted and dry, turn them right side up, place a layer of glue onto an end of the PVC pipe and set it inside the bowl. Allow at least 24 hours to fully dry.
  BLOG Mushrooms 3  
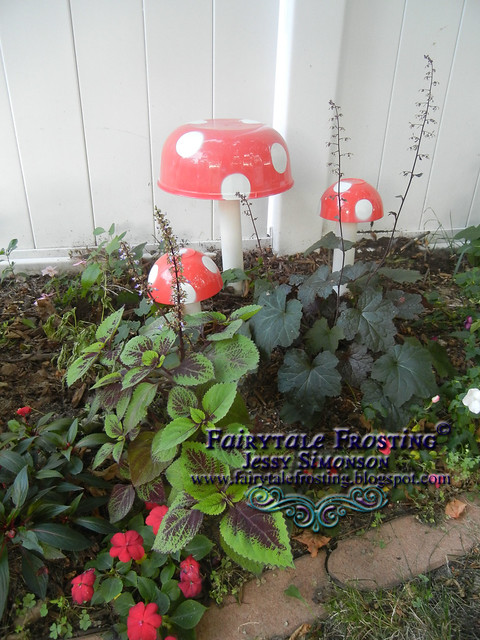
I just dug a hole a few inches deep and secured each mushroom into the ground. How fun is that?!
  BLOG Mushrooms 4 
I love how easy this was and the charm it adds to my gardens!
You could even get really crazy and make different colored mushrooms! Perhaps I'll add some blue or green ones next season!

 photo BlogSignaturecopy_zps136f6d8e.jpg

Tuesday, August 14, 2012

Lily Baby Shower Cupcakes

I adore lilies. The variety of colors, the big blossoms, they are a gorgeous addition to any garden. When I was recently asked to do lily themed cupcakes, I was really excited to try my hand at them! These cupcakes were made for an elegant pink and gray baby shower. The mom to be loved star gazer lilies and was planning to name her daughter Lily.


Monday, July 16, 2012

Wine Bottle Tiki Torches

You might not guess this from looking at me, but I'm a bit of a wine-o. A perfect night is hanging out on the patio with my girlfriends and a glass of wine. But, drinking wine means empty bottles and hanging out on the patio means mosquitoes, you know the Minnesota National Bird. When I saw a tutorial on Design Sponge for a wine bottle tiki torch I knew I had to try it.  I mean really, it solves both problems! Repurposing used wine bottles and keeps away mosquitoes. However, I did end up having to modify some things just slightly, so I made a tutorial too. Check it out!
 Supplies:
Wine Bottle (empty and cleaned)
3/8" Threaded Rod (This was sold in 3 foot lengths. I cut it into 4-5 inch lengths with a hacksaw)
2, Hex Nuts threaded for 3/8" rod
2, #10 x 1" Zinc Plated Wood Screws 
3/4" Split Ring Hanger, threaded for a 3/8" rod
Top Plate Connector, threaded for 3/8" rod
1/2" x 3/8" Coupling
1/2" Cap (this is optional, but I recommend it)
1/2" Teflon Tape
Replacement Tiki Wick
Citronella Tiki Torch Fuel (not pictured)

Now you're thinking, what? Where the heck do I find all of this stuff?! I found it all in the plumbling section at Menards.  All of it except the threaded rod, screws, hex nuts and tiki wicks.  The threaded rod, screws and hex nuts were located in the hardware section. My Menards store didnt have tiki wicks, but I found them at Target in their seasonal outdoor section. Oh and the citronella fuel was located in the outdoors section at either Menards or Target.
It took me awhile to find the stuff at Menards.  I'm not going to lie, having no prior plumbing experience or really any sort of construction experience, I looked like a lost puppy.  But with a little patience and a lot of reading of signs on bins, I found what I needed....and felt like a rockstar! I've since made 4 more torches and now know exactly where to look for everything. It was pretty fun having my boyfriend along for a supply trip and he didnt know where to look for any of this so I got to show him.  Ooooh yeah, victory is mine!

OK, now that you have your supplies together and your threaded rod cut into pieces, lets get your base set up.
Start by screwing your connector plate to your fence post (or other wood surface, where you intend to hang your torch---please be mindful that it is an open flame! Do not place your torch anywhere that could ignite surrounding things such as bushes, trees, etc)
1. Take your 2 wood screws and secure connector plate to post
2. Screw hex nuts to both ends of threaded rod.  Move the screws closer to the center of rod so that we can attach the connector plate and ring to the ends.
3. Connect the rod to the already secured connector plate.  Move the hex nut on that end all the way up to the connector plate.
4. Attached split ring hanger to the opposite end of the rod. Screw this in until the end of the rod is flush with the inside of the ring. Then, secure with the other hex nut.

Now lets prepare your bottle:
 Begin by taking the coupler and teflon tape. The coupler is a bit small to fit inside your wine bottle, so you will need to wrap the base with teflon tape.  You will wrap the thicker part of the base with the tape until it fits snuggly inside your bottle.  This is what will hold the tiki wick in place. Just keep wrapping with tape, keeping the tape as flat as possible. After a few wraps, you can test it in the bottle.  Keep wrapping until it fits snug and secure.
Once your coupler is properly wrapped you can pull it back out, thread the wick through and then put it back in.  You can also fill it with citronella fuel before reinserting the wick.  However, I waited until my bottle was securely hung before doing that. 

Next, you will open the screws on the split ring, place your bottle in between the ring and then tighten the screws.  BE CAREFUL not to tighten them too tight, you don't want to break the glass!! Just tighten each side until it holds the bottle securely.
**Note: the 3/4" split ring fits most wine bottles.  It fit all of mine. However, you can always go up to a 1" split ring if you have a larger bottle, or a 1/2" split ring if you are using a smaller bottle.
At this point, I pulled out the wick again and used a funnel to pour in my citronella fuel. Then reinsert the wick.
When not using the torches, you will place the cap on the wick.  DO NOT make the mistake I made...I pushed the cap down onto the wick, which them pushed the wick out of the coupler into the bottom of the bottle.  I had to fish it out with a skewer, it was just a hot mess. 
When you put the cap on make sure to just gently set it on top of the wick.  The cap is optional, but I recommend using it to help keep your wick dry from dew and rain when you arent burning it.
One last tip, I do also recommend letting your wick sit in the oil, in the bottle, before you start to burn it.  In other words, I know you are excited that you just hung up your torch, but wait about 10 minutes and then marvel in your awesomeness.


That's all there is to it! Enjoy!


Thursday, June 21, 2012

Butterfly Wing Nail Art

I love butterflies. They are so graceful and delicate. I happen to have 2 butterfly tattoos.  Yep, Im that girl. What can I say, you love what you love right? So I decided to try this butterfly wing inspired nail art.  True to form, I just did my ring finger.
I didn't want to do a traditional French tip so I did sort of an ombre effect.  I layered yellow polish, orange polish and another orangey-yellow polish.  No special technique, I just kept swiping the polish on until I liked the color.
I did the same color technique on my ring finger, over the whole nail instead of just the tip.
Once that dried I used a toothpick and black polish to draw in the wing detail, and then a toothpick with white polish for the dots.
Next time, I'll try a nail art pen or a small brush to do the lines.  They came out a little thicker than I'd have liked with the toothpick.  
I do love the orange and yellow for summertime though!
What is your favorite polish color for summer?

Tuesday, April 17, 2012

Fairytale Direction Sign

I am so excited to share this project! We are having an unseasonably warm spring in Minnesota, so I have been anxious to get out in my yard. Its still to early to do much in terms of planting, so I got started on some yard art.  I fell in love with this pin:


(This pin's source isnt accurate. I've tried to find the original source without success. If you know it please message me.)

I have a small corner of my yard that could really use some landscape help this year. I decided to recreate this idea for my yard. (Don't mind the plants around it, I'm working on that later in the season!)
To make this sign, I first chose the names/locations from my favorite books, movies, and real life places. I figured out how many signs I wanted on the post. Fortunately we had lots of random pieces of wood in our garage from other projects. I gave everything a coat of white exterior paint. I searched online for free fonts that matched the places I picked. I adjusted the font sizes as necessary, printed them in the reversed mirror image so it would read correctly when I transferred it. I placed each name ink side down and I used rubbing alcohol to transfer the text onto each board. I just dabbed it on with a cotton ball. Carefully peeling the paper away you will have a light transfer of the text.  Enough to paint over with black paint. I used acrylic craft paint. I gave it a quick coat of sealant before constructing it all.
Do you know where all the places are from?
The Great Valley:  The Land Before Time, a childhood favorite movie for my family
Edinburgh: Scotland. I studied in a nearby town during college. Edinburgh is one of my most favorite places on the entire planet.
Hogwarts: Harry Potter....fan of the books and movies. My sister and I went to the midnight release for a few of the books and all of the movies.
Narnia: The Chronicles of Narnia, another childhood favorite that I loved even more when I read them again as adult. I also loved the movies that have come out so far!
The Ivory Tower: The Neverending Story, probably my most favorite childhood movie. Bastian had to try and make it to the Ivory Tower to save all of Fantasia.
The Shire: Lord of the Rings, books I actually red while studying in Scotland, so its duly sentimental.
Diagon Alley: Again, Harry Potter
Emerald City: Wizard of Oz, my goal is to get shoes just like Dorothy's!
District 12: The Hunger Games, my new love
Rivendell: Another Lord of the Rings reference. This was actually more my favorite place in the movies. It was beautifully portrayed.
Magic Kingdom: I have been to Disney World too many times to count. It is another one of my most favorite places in the world.

I guess you could say that this Pinterest project was a success!

Monday, April 9, 2012

Easter Tablescape

I hope everyone had a fantastic Easter holiday!  This is my small, modest Easter tablescape for this year.
I made these daffodils from crepe paper. Flower making is my latest endeavor. Expect to see lots more of these!
Happy Easter!

Thursday, April 5, 2012

Suspended Mason Jar Herb Planters

I love cooking with fresh herbs, especially basil. I use a lot of basil. I love how it makes my kitchen smell, I love the flavor, and I love the bright green color. Since I live in Minnesota and its not exactly warm year round, I wanted to find a way to bring fresh basil into my kitchen.  However, I also have a really small kitchen. I don't have the space for a counter top herb garden. So I came up with this idea instead!
I filled mason jars first with some gravel and sand, then potting soil and I split a fresh basil plant in two. The jars are suspended by hose clamps. The hose clamps are connected to the cabinets by a metal plate and screws. 
Now I can have fresh basil whenever I'd like! I may even add a couple more jars with different herbs too.

Monday, May 2, 2011

Bunnies & Beans

What's that you say? Easter is long gone already? Oh. Well, that's OK, I'm still sharing my Easter stuff now. Its not uncommon in our house to "reschedule" holidays.  Why?  David and I work opposite schedules.  We do not share a day off together.  We often have to squeeze in celebrations during the week after I'm done with work during the day.  So, our Easter celebrations happened after the time everyone else celebrated.  Here is how we enjoyed this spring holiday!
Pin It

This is our "Bunnies and Beans" Easter Dessert Table!
 David and I looooove jelly beans. During Easter, you can find all kinds of jelly beans, so I decided what better than a Bean Tasting?!  I bought us a few different kinds of beans to try.  However, this is a Bunnies & Beans theme, so I made these cute origami bunny bowls!
 Pin It

Aren't they cute?! I learned how at Origami Spirit via How About Orange
 What tasting is complete without Tasting Notes?!  David and I both agreed that Jelly Belly made the best beans, followed by Sour Patch Kids, and then we differed.  He liked Starburst, I liked Jolly Rancher.  All around, we just love jelly beans!

 Of course I had to make some bunny cookies!
 These Peeps Cookies were too cute to resist, thanks to Sweet Sugarbelle!

While I'm on the subject of Peeps, we also have S'Meeps on the dessert table!
 Pin It

If you've been reading my blog for awhile, you already know I love to use paint chips. For example, HERE for Valentines Day and HERE for Halloween. So I made some peeps out of paint chips. Does that make them...."Peep Pips"?  Ha ha, I know. Terrible joke.
As if we didn't have enough sugar, I also made some special cupcakes.  These babies were filled with Cadbury Creme Eggs, others with the Cadbury Caramel Eggs and others with Reese's Peanutbutter Cup Eggs!

Later I used some of the table decor for our actual Easter Dinner. Check out the sweet Egg Chandelier! I found a tutorial HERE via How Does She?.  I actually wanted to do all yellow eggs, but I literally got the very last pack of those plastic eggs.  I put in some battery operated tea lights, and hung them from our existing light fixture.
OK, I know picture overload, but here is the last one.  As a side dish I made these super fun crescent roll carrots and stuffed them with potato salad! They didn't turn out quite as nice as the tutorial HERE but I couldn't find the crescent roll "sheets" and I didn't have the cream horns.  So I improvised.  Still think they turned out great! Thanks to Kim at Party Frosting for sharing this awesome idea!

A few more great details to share....I made some pink chocolate cups on the dessert table with a tutorial from Celebrations at Home
That super cute Easter subway art was from Eighteen 25.

Our Easter might have been a little later than everyone else's but it sure was fun!

Thursday, April 28, 2011

Peep Wreath!

Staying true to my past practices, I am sharing with you my holiday fun, after the holiday.  As hard as I try, I just cant get it together to do all of this before a holiday.  I create my desserts and tables to share during the holiday. I would love to have inspired my readers before the event occurs, but alas, I am late again!
Today I share with you my Peep Wreath!  

It was super festive for the few hours it hung.  When the sun started shining on the front of my house, it became very very hot and the peeps started falling off!  It seems the glue didn't hold once it got so hot.  I haven't decided if I should fix the wreath or admit defeat.  Either way, it was cute while it lasted!
Stay tuned for more belated Easter posts!

Monday, April 4, 2011

Cupcakes For My Gnomies

Recently, I went on a girls scrapbooking weekend.  The ladies I scrapbook with are an amazing group of women. We've been doing these weekends for awhile now, so we have developed jokes about some pretty random things.  One of which is a love for gnomes.  In honor of spring, and our shared love of these mythical creatures,  I made these cupcakes! Check them out.....You think you gnome, but you have gnome idea!

Gnomes love their toadstools.
I'm obsessed with disco dust!
Speech bubbles for my gnomes....hey, gnomes have stuff to say too.


This guy was a favorite.  The saying, became a weekend favorite too.
Now you gnome what it's all about. Gnome what I'm saying?
This one's for my gnomies!

LinkWithin

Related Posts with Thumbnails