


Yesterday I shared with you how I made over my bedroom door and closet door. Today check out what I did to the inside of my bedroom closet!
This is what my closet looked like before. I attempted some creative organizing but it really wasn't working out.

Here is what it looks like after! Well without all of my clothes and stuff in it yet!

I decided to utilize the door as jewelry storage. I am a visual person and need to see my options laid out in front of me.
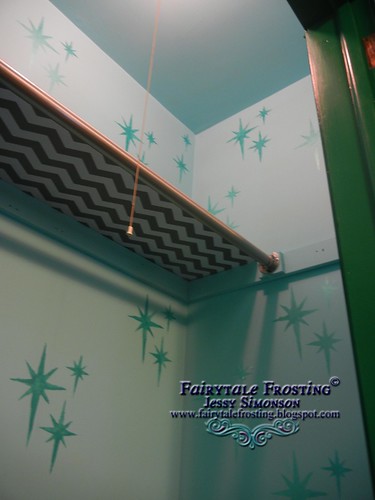
I covered the shelf with left over contact paper from my Pantry Project. I painted the inside blue with a 50's starburst retro design in aqua.

Originally I had planned to use different door knobs to hang bangles and bracelets on. However door knobs are expensive. Instead I used glitter on some clear gems and hot glued them to long screws.
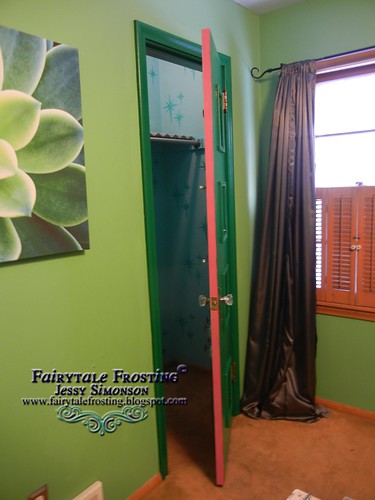
For an added burst of fun, I painted outer frame of the door hot pink!!

I wanted to create a whimsical vibe so I changed the door knob and added a key hole plate to it. The key hole part isnt functional but it looks fantastic!
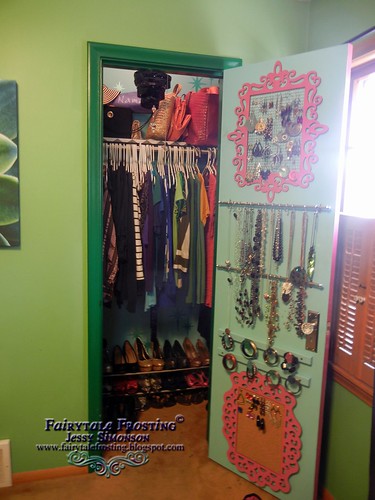
Here is the inside with all of my clothes and jewelry. Nice, neat, and organized!

For a little added glam I made this faux chandelier.

I also love elephants so when I found this crystal elephant pull chain, I had to have it!

The final touch was to organize my clothes. I organize by color then sleeve length. I made these dividers for easy organization.
So what do you think?! I hope you love it as much as I do! Every morning its like opening a secret door to wonderland!!
Thanks for stopping by!

Linking up to:

Really pretty! Great job! How'd you do those retro stars? They came out great. I thought it was wall paper!
ReplyDeleteThank you! I actually found the pattern online and cut myself a stencil. I'll do a post in the next day or two with the details. I took a couple of "during" photos I could use.
Delete