Last weekend I had some girlfriends over for movie night and made this dip. We devoured the bowl! This is a delicious dip, and during this season it is a great go-to recipe for those holiday parties!!
Avocado Blue Cheese Dip
From My Kitchen Affair
Serves 4
Ingredients:
1 medium ripe avocado
2 Tbsp chopped onion
1/2 Tbsp lemon juice
1/4 cup sour cream
1/4 cup crumbled blue cheese
1/2 tsp salt
Black pepper (to taste)
Directions:
Peel and core avocado, scooping insides into a food processor. Add onion and lemon juice. Puree until smooth.
Add sour cream, blue cheese, salt and pepper. Continue to blend until smooth. Season again with salt and pepper to taste. Top with more blue cheese crumbles.
Chill in the refrigerator for at least an hour before serving.
Because of the avocado in this dip, I would not recommend making this until the day of your event.
I also served this with Town House Sea Salt and Olive Oil Flat Bread Crisps. I highly suggest the same combination!
Enjoy!
Showing posts with label Recipes. Show all posts
Tuesday, December 11, 2012
Avocado Blue Cheese Dip
Monday, November 19, 2012
Cheese Ball Pumpkins
Need a fun fall appetizer for Thanksgiving? Try these cheese balls! They will be a great hit!
Cheese Ball Pumpkins
Slightly Adapted from Betty Crocker
Ingredients:
1, 8 oz. container of Cheddar cold pack cheese (such as Merkt's)
Ritz Crackers
Pretzel Sticks
Flat Leaf Parsely
Directions:
Line a baking sheet with wax paper.
Chill container of cheese in the freezer for 20-30 minutes until the cheese is very firm, but not frozen.
Scoop out cheese with half a tablespoon, roll into balls and place on baking sheet. Continue until the cheese is used up.
Replace cheese balls into freezer and chill for another 15 minutes or so, until firm.
Use a toothpick to draw the lines like a pumpkin into each ball.
Stick half a pretzel stick into each ball and place on a ritz cracker. Top with pieces of parsley leaves.
Enjoy!
Cheese Ball Pumpkins
Slightly Adapted from Betty Crocker
Ingredients:
1, 8 oz. container of Cheddar cold pack cheese (such as Merkt's)
Ritz Crackers
Pretzel Sticks
Flat Leaf Parsely
Directions:
Line a baking sheet with wax paper.
Chill container of cheese in the freezer for 20-30 minutes until the cheese is very firm, but not frozen.
Scoop out cheese with half a tablespoon, roll into balls and place on baking sheet. Continue until the cheese is used up.
Replace cheese balls into freezer and chill for another 15 minutes or so, until firm.
Use a toothpick to draw the lines like a pumpkin into each ball.
Stick half a pretzel stick into each ball and place on a ritz cracker. Top with pieces of parsley leaves.
Enjoy!
Labels:
Appetizers,
Autumn,
Recipes,
Thanksgiving
Monday, November 12, 2012
Double Layer Pumpkin Cheesecake Pie
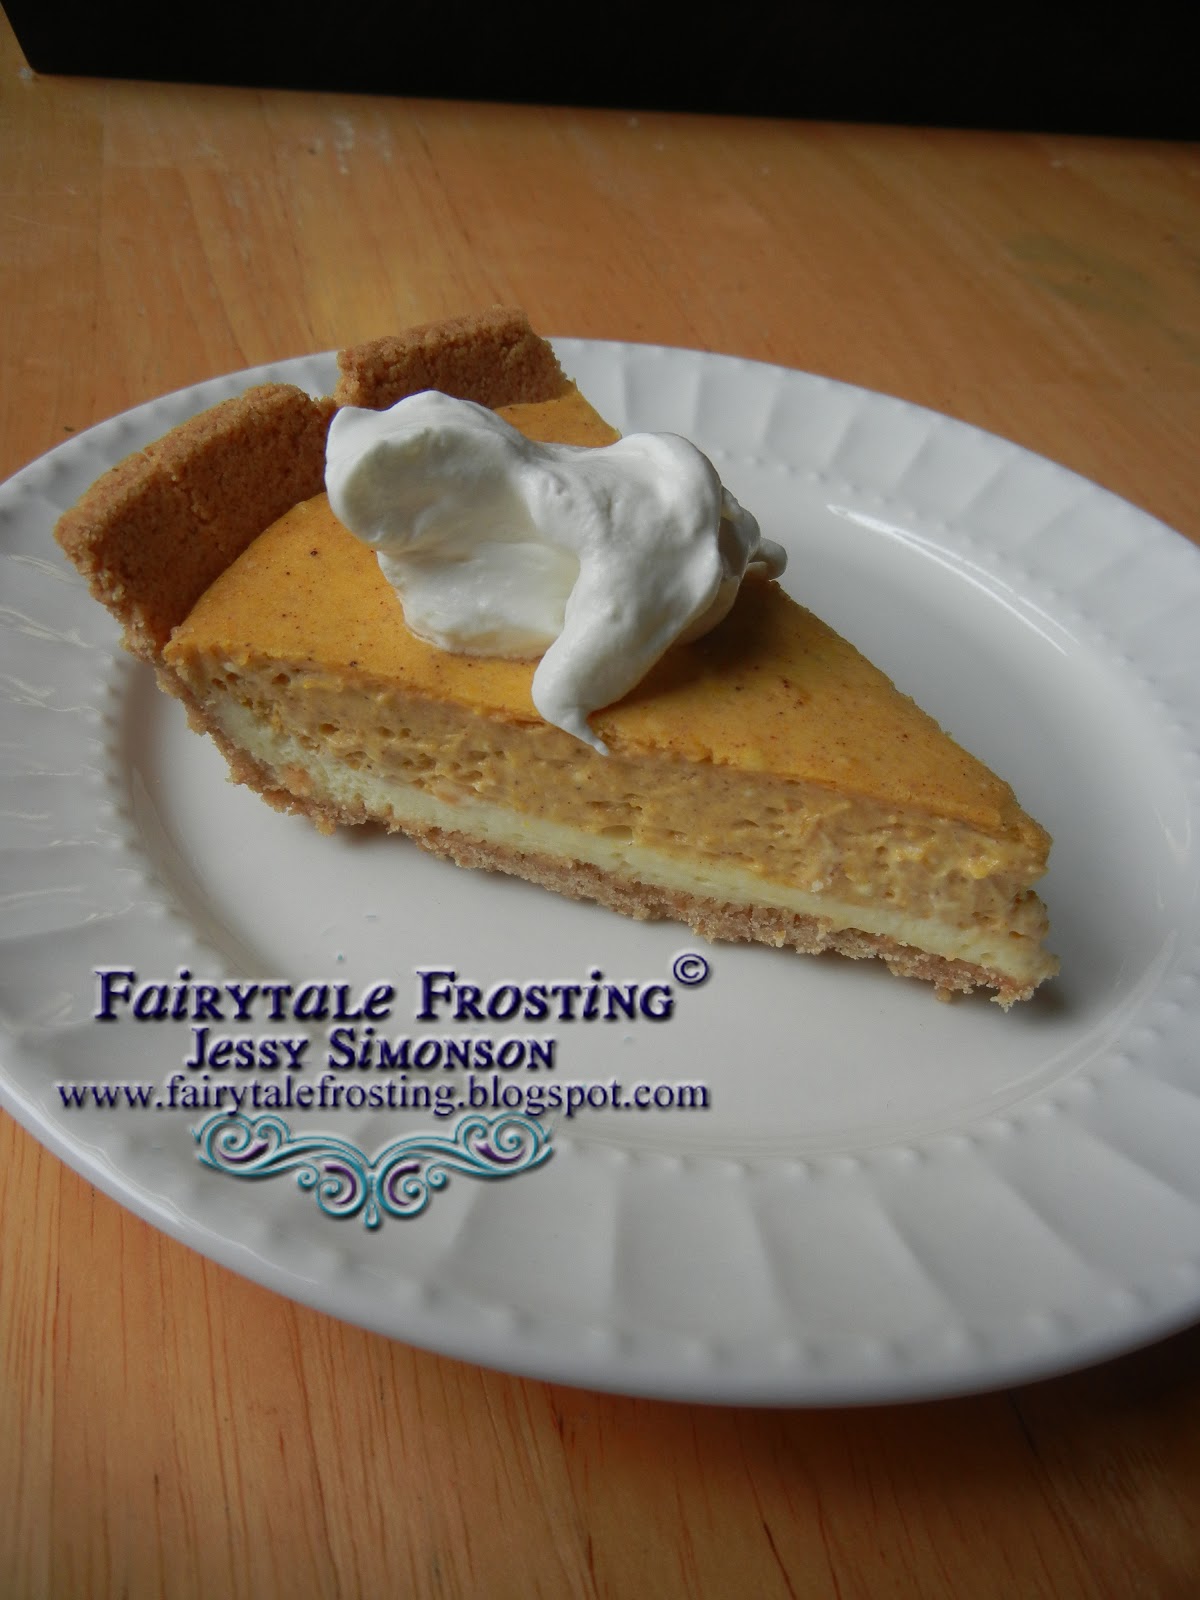
Thanksgiving is coming up quickly. This recipe is a great twist on a traditional pumpkin pie. I don't know about you but I love me some pumpkin pie! But cheesecake, its probably my all time favorite dessert. This is a delicious blend of the two! Yum!!
Double Layer Pumpkin Cheesecake
Recipe from All Recipes
Ingredients:
2, 8 oz packages of cream cheese, softened
1/2 cup sugar
1/2 tsp vanilla extract
2 eggs
1, 9 inch graham cracker crust
1/2 cup pumpkin (fresh or canned)
1/2 tsp cinnamon
1 pinch ground cloves
1 pinch ground nutmeg
Cool Whip (optional)
Directions:
Preheat oven to 325 degrees.
In a large bowl, combine cream cheese, sugar and vanilla. Beat until smooth. Blend in eggs. Remove one cup of batter and spread onto graham cracker crust. Set crust aside.
Add pumpkin and spices to the remaining batter. Stir until well combined.
Spread batter over the layer already in the pie pan.
Bake for 35 to 40 minutes, or until center is almost set.
Allow to cool. Refrigerate for 3 hours or overnight.
Serve with whipped topping.
Double Layer Pumpkin Cheesecake
Recipe from All Recipes
Ingredients:
2, 8 oz packages of cream cheese, softened
1/2 cup sugar
1/2 tsp vanilla extract
2 eggs
1, 9 inch graham cracker crust
1/2 cup pumpkin (fresh or canned)
1/2 tsp cinnamon
1 pinch ground cloves
1 pinch ground nutmeg
Cool Whip (optional)
Directions:
Preheat oven to 325 degrees.
In a large bowl, combine cream cheese, sugar and vanilla. Beat until smooth. Blend in eggs. Remove one cup of batter and spread onto graham cracker crust. Set crust aside.
Add pumpkin and spices to the remaining batter. Stir until well combined.
Spread batter over the layer already in the pie pan.
Bake for 35 to 40 minutes, or until center is almost set.
Allow to cool. Refrigerate for 3 hours or overnight.
Serve with whipped topping.
Monday, October 29, 2012
Candy Corn Oreo Torte
Halloween is closing in on us, so I had to make sure to try out those Candy Corn Oreos! I made a delicious pudding torte with them. You have to try this!
Candy Corn Oreo Torte
Adapted from my Mom's Pudding Torte Recipe
Ingredients:
1 pkg Candy Corn Oreos
2 Tbsp butter, melted
4 oz. Pumpkin Spice Cream Cheese
1/2 cup Powdered Sugar
1/2 cup Cool Whip, plus more for topping
1 pkg Butterscotch Pudding
2 cups Milk
1 tsp Pumpkin Pie Spice
Candy Corn
Directions:
Place all but 2 rows of Oreos in a plastic bag and crush with a mallet or rolling pin. Pour into bowl, scraping out any bits of the cookie that may stick to the plastic bag. Mix in melted butter and stir until mixture is wet.
Press cookie mix into the bottom of an 8x8 square pan or baking dish.
In a medium bowl, mix together cream cheese, powdered sugar, and Cool Whip. Using a spatula spread over cookie crust.
Take one more row of Oreos and chop into course chunks. Set aside.
Mix pudding and milk per package directions. Stir in Pumpkin Pie Spice and Oreo chunks.
Pour into prepared pan. Refrigerate at least 1 hour.
Quarter the remaining Oreos.
Once set, cut torte into squares, top each square with Cool Whip, an Oreo chunk, and candy corn.
Enjoy the Halloween-goodness!
Candy Corn Oreo Torte
Adapted from my Mom's Pudding Torte Recipe
Ingredients:
1 pkg Candy Corn Oreos
2 Tbsp butter, melted
4 oz. Pumpkin Spice Cream Cheese
1/2 cup Powdered Sugar
1/2 cup Cool Whip, plus more for topping
1 pkg Butterscotch Pudding
2 cups Milk
1 tsp Pumpkin Pie Spice
Candy Corn
Directions:
Place all but 2 rows of Oreos in a plastic bag and crush with a mallet or rolling pin. Pour into bowl, scraping out any bits of the cookie that may stick to the plastic bag. Mix in melted butter and stir until mixture is wet.
Press cookie mix into the bottom of an 8x8 square pan or baking dish.
In a medium bowl, mix together cream cheese, powdered sugar, and Cool Whip. Using a spatula spread over cookie crust.
Take one more row of Oreos and chop into course chunks. Set aside.
Mix pudding and milk per package directions. Stir in Pumpkin Pie Spice and Oreo chunks.
Pour into prepared pan. Refrigerate at least 1 hour.
Quarter the remaining Oreos.
Once set, cut torte into squares, top each square with Cool Whip, an Oreo chunk, and candy corn.
Enjoy the Halloween-goodness!
Monday, October 22, 2012
Pumpkin Fudge
Yep, I still have left over pumpkin from my CSA haul, that I talked about here. I came across a recipe for Pumpkin Fudge. Fudge to me, always reminds me of my great grandmother. Grandma Travis brought a tin of a fudge to the holiday gatherings every year. My mom has actually carried on that tradition too. Fudge is an indulgent, decadent treat. The kind of treat you can only have one or two pieces of or you may actually make your teeth fall out right there. So obviously, I had to try out a pumpkin version and oh. my. gawd. Yum.
Pumpkin Fudge
Recipe from Recipe Girl
Ingredients:
3 cups sugar
3/4 cup melted butter
2/3 cup evaporated milk
1/2 cup pumpkin (fresh or canned)
2 Tbsp light corn syrup
1 tsp pumpkin pie spice
1, 12 oz package white chocolate chips
1, 7 oz jar marshmallow cream
1 cup chopped pecans (optional)
1 tsp vanilla extract
Directions:
Line a 9 inch square pan with tin foil. Spray with non-stick spray.
Stir together the first 6 ingredients, in a sauce pan, on medium-high heat. Stir constantly until the temp on a candy thermometer registers 234 degrees (approximately 12 minutes)
Once mixture reaches 234 degrees, remove from heat and quickly stir in white chocolate, marshmallow cream, pecans and vanilla. Stir until well blended.
Pour into prepared pan. Allow to completely cool, and stand for about 2 hours. Cut into squares.
Yield: Approximately 3 pounds of fudge
**Note: I added a little orange gel food coloring to my batch. I used fresh pumpkin and the orange color wasnt quite rich enough for me.
Pumpkin Fudge
Recipe from Recipe Girl
Ingredients:
3 cups sugar
3/4 cup melted butter
2/3 cup evaporated milk
1/2 cup pumpkin (fresh or canned)
2 Tbsp light corn syrup
1 tsp pumpkin pie spice
1, 12 oz package white chocolate chips
1, 7 oz jar marshmallow cream
1 cup chopped pecans (optional)
1 tsp vanilla extract
Directions:
Line a 9 inch square pan with tin foil. Spray with non-stick spray.
Stir together the first 6 ingredients, in a sauce pan, on medium-high heat. Stir constantly until the temp on a candy thermometer registers 234 degrees (approximately 12 minutes)
Once mixture reaches 234 degrees, remove from heat and quickly stir in white chocolate, marshmallow cream, pecans and vanilla. Stir until well blended.
Pour into prepared pan. Allow to completely cool, and stand for about 2 hours. Cut into squares.
Yield: Approximately 3 pounds of fudge
**Note: I added a little orange gel food coloring to my batch. I used fresh pumpkin and the orange color wasnt quite rich enough for me.
Monday, October 15, 2012
Grocery Shopping & Menu Planning: What Works For Me
Recently, I was
I dont really coupon but I have been able to better organize my grocery shopping so that we clean out our fridge before I go to the store again. This has actually saved us money because we eat at home more and use all of our food before it spoils.
I was telling my friend about this and thought I'd share my process with you! Now, this is a fluid process, it has grown and changed over the last several months, but for now, this is what works for me.
I blog about food, so I am always on Pinterest and other favorite blogs checking out recipes. This is probably what helps me the most, because I already have an interest in food. Im always pinning recipes to try later. But then when I go back and look at the pins, I get really overwhelmed combing through the ingredients of each recipe.
That is when I discovered Ziplist. Ziplist is a life saver!!! Now, instead of pinning recipes, I just installed the Ziplist Recipe Clipper into my toolbar. I zip it, and it saves the recipe and ingredients for me. Its also handy because you can add tags and search your recipe box later. I find this useful for recipes we really loved. I tag them with "I loved" "David Loved" or "We Loved" and then later, I can find them quickly.
Every week (give or take a few days) when I am preparing to grocery shop, I sit down and look at Ziplist. I typically plan 5 dinners. At my house its just David and I so this works well for us, I'm sure this strategy could translate into bigger households though too.
I plan 5 dinners, usually the recipes serve 4-6 people. I make a list of the 5 recipes I've chosen and post it on my fridge. I find that instead of saying "On Monday we will have this for dinner" I just list the 5 recipes and as I make them, I cross them off the list.
This is helpful because:
- I dont have to stare at the fridge and wonder what Im going to make tonight.
- I dont stare at my fridge and wonder why I bought 3 green peppers, or whatever other miscellaneous ingredients I forgot why I bought
- If Im not in the mood for chicken, I can just pick a different recipe from my weekly menu, sometimes you just gotta make whatever you're craving that day
Once all of my recipes are loaded onto my shopping list, I quickly add anything else we would normally need, like milk, eggs, etc.
I cruise the local ad for coupons and then head to the store.
Ziplist has an app for your phone, so there is no need for me to bring a list! Whats great too is Ziplist stores your list by departments. So I get everything in the produce section before I move on. No more, being on the other end of the grocery store when you realized you missed carrots, which were further down your hand written list.
There you have it. I now have my menu complete, my grocery shopping complete, and what else is great is, I mentioned its just the 2 of us, and our recipes serve 4-6 people. Well, I just made us lunches all week too.
So let me recap the benefits again....
- Recipes are all stored in one place, with the ingredients needed
- Menu planning is done in a snap (Mine usually takes about 15 minutes to do)
- Grocery List is completed in minutes and arranged by grocery department
- All the food I buy gets eaten
- My menu is laid out for me with the flexibility I need
- I save money because I only buy what I know Im going to cook
- I take the guess work out of what's for lunch because as I prepare each dinner, Im also preparing the next day's lunch
So pop on over to Ziplist and check it out. You can thank me later!
**Ziplist did not sponsor this post. They have no idea who I am. I'm totally sharing this because it has really impacted my life and I hope it will be helpful to others. This is all based on my own preferences and personal experiences with menu planning, budgeting and of course using Ziplist.
Labels:
Budget Ideas,
Organization,
Recipes,
Tips,
Truth
Friday, October 12, 2012
Sweet and Spicy Pumpkin Seeds
To round out this week of pumpkin recipes, I leave you with Sweet and Spicy Toasted Pumpkin Seeds. I was able to make all these recipes with 1 fresh pumpkin, and of course I couldn't waste the seeds!
Sweet and Spicy Toasted Pumpkin SeedsRecipe from 101 Cookbooks
Ingredients:
1 cup fresh pumpkin seeds
1 egg white
1/2 cup sugar
1/2 tsp cayenne pepper
1/2 tsp sea salt
Directions:
Preheat oven to 375 degrees.
In a medium bowl whisk together egg white, sugar, pepper, and salt. Add pumpkin seeds and toss to coat. Drain off excess egg whites with a strainer.
Line a baking sheet with foil and pour coated seeds onto pan. Spread into a single layer.
Bake for about 10-12 minutes, until golden. Sprinkle with a little more sugar and pepper right when they come out of the oven. Allow to cool and enjoy!
Sweet and Spicy Toasted Pumpkin SeedsRecipe from 101 Cookbooks
Ingredients:
1 cup fresh pumpkin seeds
1 egg white
1/2 cup sugar
1/2 tsp cayenne pepper
1/2 tsp sea salt
Directions:
Preheat oven to 375 degrees.
In a medium bowl whisk together egg white, sugar, pepper, and salt. Add pumpkin seeds and toss to coat. Drain off excess egg whites with a strainer.
Line a baking sheet with foil and pour coated seeds onto pan. Spread into a single layer.
Bake for about 10-12 minutes, until golden. Sprinkle with a little more sugar and pepper right when they come out of the oven. Allow to cool and enjoy!
Thursday, October 11, 2012
Pumpkin Cheesecake Bars
Continuing with Pumpkin-licious recipes this week, I tested out a recipe for Pumpkin Cheesecake Bars. They were a hit at the work party I brought them to. Delicious! Im tempted to make another pan all for myself!
Pumpkin Cheesecake Bars
Adapted from Eat, Live, Run
Ingredients:
2 cups pumpkin (or one 15 oz can)
3 eggs
1/2 cup brown sugar
2 tbsp half and half (cream, or whole milk)
1 tsp vanilla extract
1/2 cup sugar
1 tbsp cornstarch
1 1/2 tsp cinnamon
1/2 tsp nutmeg
1/2 tsp ginger
1/2 tsp salt
2, blocks of cream cheese, softened
Whipped cream (for topping---optional)
For the graham cracker crust
2 cups graham cracker crumbs
1 stick butter, melted
1/4 cup sugar
Directions:
Preheat oven to 400 degrees
Mix graham crackers, melted butter and sugar to create crust. Combine until moistened, and press into a 9x13 pan, pressing slightly up the sides of the pan.
Bake for 5 minutes, remove and reduce oven temp to 325.
Mix pumpkin, eggs, brown sugar, cream and vanilla in a large bowl.
In your mixer, beat together cream cheese, sugar, cornstarch, cinnamon, nutmeg, ginger and salt. Beat until light and fluffy, then slowly add in pumpkin mixture.
Mix until combined and smooth.
Pour over prepared crust and bake for 50 minutes. Let cool completely. Cut into squares. Pipe whipped cream on top of each square.
Enjoy!
Pumpkin Cheesecake Bars
Adapted from Eat, Live, Run
Ingredients:
2 cups pumpkin (or one 15 oz can)
3 eggs
1/2 cup brown sugar
2 tbsp half and half (cream, or whole milk)
1 tsp vanilla extract
1/2 cup sugar
1 tbsp cornstarch
1 1/2 tsp cinnamon
1/2 tsp nutmeg
1/2 tsp ginger
1/2 tsp salt
2, blocks of cream cheese, softened
Whipped cream (for topping---optional)
For the graham cracker crust
2 cups graham cracker crumbs
1 stick butter, melted
1/4 cup sugar
Directions:
Preheat oven to 400 degrees
Mix graham crackers, melted butter and sugar to create crust. Combine until moistened, and press into a 9x13 pan, pressing slightly up the sides of the pan.
Bake for 5 minutes, remove and reduce oven temp to 325.
Mix pumpkin, eggs, brown sugar, cream and vanilla in a large bowl.
In your mixer, beat together cream cheese, sugar, cornstarch, cinnamon, nutmeg, ginger and salt. Beat until light and fluffy, then slowly add in pumpkin mixture.
Mix until combined and smooth.
Pour over prepared crust and bake for 50 minutes. Let cool completely. Cut into squares. Pipe whipped cream on top of each square.
Enjoy!
Wednesday, October 10, 2012
Pumpkin Cinnamon Rolls
There is nothing like waking up in the morning, pouring a cup of coffee and having a sweet, warm, and gooey cinnamon roll. Its even better when its pumpkin!! So start with your cup of Salted Caramel Pumpkin Coffee and whip up a batch of cinnamon rolls. I'll admit, there is a little effort involved in these. I was intimidated by them. But now that I've done it, its kind of fun and there is something satisfying about having all that deliciousness and knowing you made it yourself!
Pumpkin Cinnamon Rolls
Recipe from: The Girl Who Ate Everything
Ingredients:
Directions:
In a small sauce pan, heat milk and butter until warm.
In a large mixer bowl combine pumpkin, sugar, nutmeg, pumpkin pie spice and salt. Add the milk mixture and beat until well combined.
Beat in eggs and yeast.
Add half of the flour to the mixture and beat on low, scraping the sides of the bowl until well combined. Add remaining flour and combine.
Lightly grease a bowl and put the soft dough into the bowl, turn to cover with oil.
Cover with plastic wrap, set in a warm place and allow to rise. This should take about 1 hour.
Punch dough down and turn over onto a floured surface. Knead a few times to smooth out the dough.
Roll into a rectangle, approximately 12x10 inches.
In a small bowl combine the brown sugar and cinnamon. Brush the dough with melted butter and sprinkle the sugar mix over the dough.
Starting at the long end of the dough, roll up jelly roll style. Using a sharp knife cut into 1 inch slices (approximately 12 total)
Place rolls, cut side up into a pan (I used a 9x13). Cover again and let rise for about 45 minutes. The rolls should double in size.
Bake rolls at 350 degrees for 15-20 minutes until golden. Cool for a few minutes and top with cream cheese icing.
Cream Cheese Icing
Recipe From: Food.com
Ingredients:
4 ounces cream cheese, softened
1/4 cup butter, softened
1 1/2 cups powdered sugar
1 1/2 tsp milk
1/2 tsp vanilla extract
Directions:
Combine all ingredients in a mixing bowl. Beat until well combined. Spread over warm rolls.
Now go and enjoy your pumpkin deliciousness and bask in your cinnamon roll making accomplishment!
Pumpkin Cinnamon Rolls
Recipe from: The Girl Who Ate Everything
Ingredients:
1/3 cup milk
2 tablespoons butter
1/2 cup pumpkin(fresh or canned)
2 tablespoons sugar
1/4 teaspoon nutmeg
1 tablespoon pumpkin pie spice
1/2 teaspoon salt
1 egg, beaten
1 (1/4 ounce) package dry yeast
2 cups bread flour (you can use regular all purpose flour but bread flour makes them lighter)
1/2 cup brown sugar, packed
2 teaspoons ground cinnamon
2 tablespoons melted butter
Directions:
In a small sauce pan, heat milk and butter until warm.
In a large mixer bowl combine pumpkin, sugar, nutmeg, pumpkin pie spice and salt. Add the milk mixture and beat until well combined.
Beat in eggs and yeast.
Add half of the flour to the mixture and beat on low, scraping the sides of the bowl until well combined. Add remaining flour and combine.
Lightly grease a bowl and put the soft dough into the bowl, turn to cover with oil.
Cover with plastic wrap, set in a warm place and allow to rise. This should take about 1 hour.
Punch dough down and turn over onto a floured surface. Knead a few times to smooth out the dough.
Roll into a rectangle, approximately 12x10 inches.
In a small bowl combine the brown sugar and cinnamon. Brush the dough with melted butter and sprinkle the sugar mix over the dough.
Starting at the long end of the dough, roll up jelly roll style. Using a sharp knife cut into 1 inch slices (approximately 12 total)
Place rolls, cut side up into a pan (I used a 9x13). Cover again and let rise for about 45 minutes. The rolls should double in size.
Bake rolls at 350 degrees for 15-20 minutes until golden. Cool for a few minutes and top with cream cheese icing.
Cream Cheese Icing
Recipe From: Food.com
Ingredients:
4 ounces cream cheese, softened
1/4 cup butter, softened
1 1/2 cups powdered sugar
1 1/2 tsp milk
1/2 tsp vanilla extract
Directions:
Combine all ingredients in a mixing bowl. Beat until well combined. Spread over warm rolls.
Now go and enjoy your pumpkin deliciousness and bask in your cinnamon roll making accomplishment!
Monday, October 8, 2012
Salted Caramel Pumpkin Coffee
Last week in my CSA box there was a baking pumpkin. I had never actually baked a fresh pumpkin before. I was pretty shocked at how easy it was, not to mention all of the delicious possibilities!!! So to kick off my pumpkin experience, lets start with some good ol' caffeine!
Ingredients:
1/4 cup milk
1/4 cup vanilla creamer
1 tbsp pumpkin (fresh or canned)
1/4 tsp pumpkin pie spice
1/2 Tbsp Caramel Sauce
Cool whip
Sea Salt (or regular salt if you don't have any sea salt!)
Directions:
In a small sauce pan combine milk, creamer, pumpkin and spice. Bring to a low boil. Remove from heat and pour into a blender. Pulse the blender a few times making it frothy (this step is optional, but I liked the frothiness) Pour frothy milk into your coffee mug and fill rest with coffee. Put a spoonful of cool whip on top an drizzle with caramel sauce. Sprinkle on sea salt and enjoy.
Stay tuned for more pumpkin goodness!
Ingredients:
1/4 cup milk
1/4 cup vanilla creamer
1 tbsp pumpkin (fresh or canned)
1/4 tsp pumpkin pie spice
1/2 Tbsp Caramel Sauce
Cool whip
Sea Salt (or regular salt if you don't have any sea salt!)
Directions:
In a small sauce pan combine milk, creamer, pumpkin and spice. Bring to a low boil. Remove from heat and pour into a blender. Pulse the blender a few times making it frothy (this step is optional, but I liked the frothiness) Pour frothy milk into your coffee mug and fill rest with coffee. Put a spoonful of cool whip on top an drizzle with caramel sauce. Sprinkle on sea salt and enjoy.
Stay tuned for more pumpkin goodness!
Wednesday, July 11, 2012
Mountain Dew and Doritos Cake
My boyfriend David says that I have odd tastes in food. He often thinks that flavor combinations I think sound good, sound awful. He says that my tastes in food are "bougie". According to Urban Dictionary, bougie means "anything that is perceived as "upscale" from a blue collar point of view. 'Bougie' (pronounced boo'-she) is a hacked truncation of the word
Bourgeoisie, which refers to the middle-class in Europe, but refers to a
more affluent class level in the United States."
So I have to ask, does the combination of Mountain Dew and Doritos...in a cake....sound bougie to you?
Mountain Dew and Doritos Cake
From Nothing But Country
Makes 1, 6 inch 2 layer cake and 12 cupcakes or 24 cupcakes
Cake and/or Cupcakes:
1 box lemon cake mix
1 box lemon pudding mix
4 eggs
1 1/4 cups Mountain Dew
1/2 cup vegetable oil
Directions:
Preheat oven to 350 degrees.
Mix all ingredients together except Mountain Dew. Once ingredients are combined well, slowly pour in the Mountain Dew.
Pour mix into prepared pan and/or lined cupcake pan
Bake cupcakes for 14-15 minutes, or until a toothpick comes out clean.
Bake 6 inch cake for 35 minutes or until aa toothpick comes out clean.
Allow cakes to cool before frosting.
Mountain Dew Buttercream
4 cups powdered sugar
2 sticks unsalted butter, softened
1/8 cup Mountain Dew
1/2 tbsp lemon juice
1/2 tbsp lime juice
Directions:
Beat butter until light and fluffy. Add powdered sugar, 1 cup at a time. Add in Mountain Dew and juices. Continue beating until smooth. If consistency is too thick, add Mountain Dew, 1 teaspoon at a time until desired consistency is achieved.
If you would like to color your frosting like mine is in the photos, divide the icing into 2 separate bowls, add lime green to one bowl and lemon yellow food coloring to the other. I piped the green swirls on first and topped with yellow.
Monday, July 9, 2012
Rhubarb, Pineapple, Raspberry Pie
Recently my parents came to visit. While helping me with my gardens, my stepdad, Gary, mentioned my rhubarb was ready to be picked. I actually only have rhubarb because it was here when we moved into the house. Gary mentioned that rhubarb would make a great pie. A few days later, I was standing in front of the refrigerator, staring at it with the door open, like your mother always yells at you not to do, trying to figure out something to eat. Thats when I decided to make a pie. I picked the rhubarb and got everything together. But just rhubarb? Nah! I grabbed a container of raspberries and a can of pineapple chunks too. Let me tell you, this was one delicious pie. I wanted to eat the whole thing by myself, but I saved a few slices for my boyfriend, David. Unfortunately, my parents had already gone back to Wisconsin....sorry Gary.
Rhubarb, Pineapple, Raspberry Pie
Makes one 9.5 inch pie
Ingredients:
4 cups chopped rhubarb
1 quart raspberries
1/2 can pineapple chunks, drained (the big can, or 1 whole small can)
1 1/3 cup sugar
6 tbsp flour
1 tbsp butter
1 double pie crust (I made mine from scratch using this Martha Stewart recipe)
Directions:
1. Preheat oven to 450 degrees.
2. Roll your first pie crust over the pie plate.
3. Combine rhubarb, raspberries, pineaple, sugar, and flour in a bowl. Mix well, coating all of the fruit.
4. Pour fruit mixture into pie and spread out evenly.
5. Cut butter into small chunks and place on top of fruit mixture.
6. Cover mixture with second pie crust. I rolled my dough over the pie and cut the scraps and center pieces with a small cookie cutter. I used the cut scraps to create a decorative edge.
7. Place pie on bottom rack in the oven and bake for 15 minutes.
8. Reduce oven temperature to 350, and continue baking for 40-45 minutes, until the crust is golden and the filling is bubbling.
This pie is excellent warm or cold.
(PS, Im also in loooooove with instagram, here's a pic I took during the process!)
Monday, June 18, 2012
Blood Orange Cake
A few years back my sister, friend Heather, and I traveled to Rome, Italy. We were travelers on a budget, so we stopped in a local market to pick up food to pack lunches during our daily sightseeing. We grabbed a bunch of fresh oranges and headed on our way. We were quite surprised when we peeled the oranges to find them bright red in the center! We had never seen, let alone, eaten blood oranges before. We were quickly hooked on them and ate them almost every day of our vacation!
Recently I was walking through the grocery store and saw blood oranges on sale. I bought some and eating that first orange brought me right back to the first park we sat in when we realized what they were. It got me thinking......Do you remember this mouthwatering grapefruit cake I made last year? It is still one of my top favorite cakes, however this year I decided to try it again but with a twist, blood oranges!
This version of the cake was just as heavenly, but with a sweeter, more orange-y taste. I'm not sure which cake I like better they are both so good!
Click HERE to go to the recipe for the grapefruit cake. All I did was substitute blood orange for all of the grapefruit ingredients. I also added a little orange food coloring to the batter to enhance the color.
Try it out! The original and the new cake are both great summer treats!What's your favorite summertime dessert?
Wednesday, January 11, 2012
Pumpkin Spice Cake with Toasted Marshmallow Filling
I was walking through the local grocery store today and something caught my attention. It was the enticing scent of apple cinnamon and spice. We've had such a strange "winter" that it really could still be autumn. Its strange how a scent can trigger so many memories flooding back to you! Today I'm sharing a cake I made this past autumn. I was inspired by Sweetopolita's Autumn Delight Cake. You see, I'm a bit of a lazy baker. I loved the look of this recipe but decided to make it a little easier on myself. Instead of preparing the cakes like she describes I used a spice cake mix, canned pumpkin, pumpkin spice and chopped pecans. I prepared the cakes and filled them with toasted marshmallow filling. The cake was then iced with brown sugar and cinnamon swiss buttercream. I topped it with candied pecans.
Click HERE for the full cake how to from Sweetopolita.
Toasted Marshmallow Cake Filling
(From Sweetopolita)
Ingredients:
12-16 standard size marshmallows
1 cup unsalted butter, softened and cut into cubes
1 cup powdered sugar
2 tablespoons milk (I used whole)
1 teaspoon vanilla extract
7.5 ounce jar of Marshmallow Fluff
Pinch of Salt
Directions:
1. Line a cookie sheet with parchment paper and arrange marshmallows on top. Place on the lowest rack in the oven. Broil until nice and brown. Keep a close watch on them, they will burn quickly. Remove cookie sheet and carefully turn the marshmallows. Brown the other side. Remove from oven and allow to cool.
2. In your stand mixer, using a paddle attachment, whip butter. You want it really pale and fluffy, this will take around 8-10 minutes.
3. Add powdered sugar, milk, vanilla and salt. Beat for another 6 minutes.
4. Add cooled marshmallows and marshmallow cream. Beat on low for another 2 minutes.
5. Use filling right away, it will be sticky but spreads nicely as filling and keeps well in the cake.
Click HERE for the full cake how to from Sweetopolita.
Toasted Marshmallow Cake Filling
(From Sweetopolita)
Ingredients:
12-16 standard size marshmallows
1 cup unsalted butter, softened and cut into cubes
1 cup powdered sugar
2 tablespoons milk (I used whole)
1 teaspoon vanilla extract
7.5 ounce jar of Marshmallow Fluff
Pinch of Salt
Directions:
1. Line a cookie sheet with parchment paper and arrange marshmallows on top. Place on the lowest rack in the oven. Broil until nice and brown. Keep a close watch on them, they will burn quickly. Remove cookie sheet and carefully turn the marshmallows. Brown the other side. Remove from oven and allow to cool.
2. In your stand mixer, using a paddle attachment, whip butter. You want it really pale and fluffy, this will take around 8-10 minutes.
3. Add powdered sugar, milk, vanilla and salt. Beat for another 6 minutes.
4. Add cooled marshmallows and marshmallow cream. Beat on low for another 2 minutes.
5. Use filling right away, it will be sticky but spreads nicely as filling and keeps well in the cake.
Thursday, December 22, 2011
Peppermint Bark Snowflakes
Yesterday I posted about a fun and delicious gift for your coworkers. Included in that gift was a snowflake of peppermint bark. I made mine with a little twist this year. Check out the recipe....
I picked up this silicone tray in the Dollar Spot at Target. You can also substitute cookie cutters as molds for the bark. Place cookie cutters on a wax paper covered cookie sheet.
Ingredients:
Peppermint Crunch Junior Mints (I found these at Target too!)
4 oz. Chocolate Chips
4 oz. White Chocolate Chips
Handful of peppermints or candy canes
1/2 teaspoon peppermint extract, divided
Sprinkles (Mine are snowflakes!)
Vegetable Oil (not required, but good to have on hand)
Directions:
In a candy melting pot or double boiler, melt your brown chocolate chips.
Meanwhile, in a plastic bag, put your candy canes or peppermints. Crush with a rolling pin or kitchen mallet.
Once your chocolate is melted, stir in 1/4 teaspoon of peppermint extract. If your chocolate is thick or dry looking add a small pour of vegetable oil. This will smooth it out. Continue to add a little at a time until you reach a nice smooth consistency.
Pour chocolate into molds. Drop in 2-3 junior mints.
Sprinkle some peppermint chunks on top.
Place mold into freezer for 10 minutes.
Meanwhile, melt your white chocolate. Once melted, stir in remaining extract.
Remove mold from freezer. Pour white chocolate into molds.
Top with more peppermint pieces and sprinkles.
Place mold back into freezer for 10-15 minutes. When chocolate has hardened just pop out of the molds!
This recipe yields 6 snowflake bark pieces.
Labels:
Candy,
Christmas,
Gift Ideas,
Recipes,
Winter
Monday, December 5, 2011
Reindeer and Figs
This weekend, I accomplished a big personal goal and I want to share it with you. I ran in my very first 5k race! For the last 9 weeks, my friend Heather and I trained doing the Cool Running Couch to 5k Program. It all started back in 2008. I set a goal to lose weight and run a 5k. If you've ever tried to lose weight before, you know what a struggle that can be. I didn't have a running partner, or the will power to keep up with either goal. But each year, I kept saying I'd do it. Finally, this year, 2011, a full 3 years later, my friend was willing to commit to the program with me. Turns out a dedicated partner is what I needed! We met consistently 3 times a week to run. At first, it was a challenge. Our runs were slow. The first minute or two of running, I thought I was going to die. I watched the clock constantly, just waiting for it to be over. But as the days and weeks went on, I slowly became stronger, found running easier and easier. I was looking less at the clock, and more focused on my breathing.
We chose to do the Reindeer Run because the timing was perfect, we both love the holiday season, and costumes were encouraged! Not to mention the proceeds benefited Toys for Tots Heather, my boyfriend David, and myself ran the 5k. We set a goal of finishing in 40 minutes. We finished in 38 exactly. It was amazing. I've wanted this goal for so long. The fact that it was real, that we did it, that we crossed that finish line still amazes me. Its an incredible feeling to set your mind to a difficult goal and actually make it happen. Its not just about losing weight or getting in shape. Its about feeling empowered. If I can make this happen, who knows what else I might be able to accomplish! Here are a few pictures from Saturday's event....
Costumes were encouraged, so here I am with Rick. Rick is Heather's boyfriend who offered to photograph everything for us.
Here we are with the Reindeer mascot!
Rick was easily able to spot us due to my hat!
We are almost to the finish line!
FINISHED!! We ROCKED this race!
Now you're probably wondering, whats with the figs in the title? In addition to sharing my awesome accomplishment, I'm going to share my new favorite recipe. You may recall my recent post about the Wonderfall Wine Tasting one of the courses was a Fig and Gorgonzola Pizza. It is absolutely to die for! You must make this now! The pairing of flavors is incredible. Sweet, savory, all mixed into one. Its unique and flavorful. Its also, very easy!
Fig, Gorgonzola Prosciutto Pizza
(very slightly adapted from Centsational Girl)
Ingredients:
1 Boboli Thin Crust Pizza (I used a 12 inch)
Olive Oil
4 ripe Figs
1 3/4 cup shredded mozzarella cheese
4 oz. container crumbled Gorgonzola cheese
2 slices prosciutto
Diced green onion (I didn't really measure this, just chopped a handful)
Directions:
Preheat oven to 400 degrees. Drizzle olive oil over crust. Bake for 9 minutes.
Meanwhile, slice figs, dice onion, tear prosciutto into pieces.
When crust is ready, layer about half the mozzarella cheese, then half the Gorgonzola, then the figs, prosciutto, and onion. Top with remaining cheeses. Bake until golden brown, and cheese is bubbly, approximately 10 minutes.
Prepare to be amazed.
We paired this with a pinot noir and it was excellent.
Tuesday, November 22, 2011
Cranberry Mango Pineapple Chutney
Last week I made "Thanksgiving with a Twist" dinner. I made turkey and sides with traditional ingredients done up in a non-traditional way. One of the things I tried my hand at was homemade cranberry sauce. I made it with cranberries, mango and pineapple. It was delicious. I'll never go back to canned cranberry sauce! This recipe is easy and quick, and a great idea for a last minute Thanksgiving contribution!
Cranberry Mango Pineapple Chutney
Adapted from Love Veggies and Yoga
Ingredients:
1, 12 oz bag fresh cranberries
1 cup mango chunks (I used frozen mango)
1/2 cup pineapple chunks (I used canned pineapple)
1 1/4 cup water
1 cup granulated sugar
1/4 cup packed brown sugar
1 tsp. ground ginger
1 tsp cinnamon
Dash cayenne pepper (optional)
Directions:
Combine all ingredients in a saucepan. Bring to a boil. Reduce heat and allow to simmer until thickened. Approximately 20 minutes. Transfer to jars. Allow to cool, cover and refrigerate. Yields 3, 8 ounce jars or 24 ounces.
*Note: If its a little too chunky for your liking, pulse in the blender until you reach desired texture.
Its so good, even the flamingo liked it....
Happy Thanksgiving!
Thursday, October 27, 2011
Soup Week: Roasted Eggplant and Tomato Soup
As promised, here is tonight's second post. I am in love with this soup. Roasting the tomatoes and eggplant really brings out the flavor.
Roasted Eggplant and Tomato Soup
(Slightly adapted from Campbell's Kitchen)
Ingredients:
1 Medium Eggplant, peeled and diced
4 Roma Tomatoes, sliced
2 Cloves of Garlic
Olive Oil
Salt
Pepper
4 Cups Chicken or Vegetable Broth (I used chicken because its what I had on hand)
1 Tablespoon Fresh Basil
1/2 Cup Shredded Pepperjack Cheese
Directions:
1. Preheat oven to 425 degrees. Arrange eggplant, tomatoes, and garlic cloves on a baking sheet covered in foil. Drizzle with olive oil. Season with salt and pepper.
2. Roast for 25 minutes or until the vegetables are lightly browned.
3. Place vegetables, 1 cup of the broth, and 1/4 cup cheese in blender. Pulse until mixture is smooth.
4. Transfer to a large saucepan, heat to boil. Reduce heat to low and add basil. Cook for an additional 5 minutes. Serve and enjoy!Soup Week: Sweet Potato Soup
Sorry friends for missing the post yesterday! Some unexpected things came up and I was unable to get to my computer and write my post for the day. So, today you get two soup posts!
Today's recipe is for Sweet Potato Soup. I've been experimenting with different, hearty soups that are still within a calorie range I dont have to feel guilty about. This soup fits the bill!
Sweet Potato Soup
(Recipe from Campbell's Kitchen)
Ingredients:
5 Medium Sweet Potatoes
2 Tablespoons Butter
1 Large Onion, Chopped
2 Stalks of Celery, Chopped
6 Cups of Chicken Broth (or veggie broth could work!)
1 Medium Potato (I used a baking potato) Peeled and cut into cubes
1/3 Cup Maple Syrup
Pepper
2 Tablespoons Light Cream
Directions:
1. Pierce the sweet potatoes with a fork. Bake at 400 degrees for 1 hour until they are tender.
2. Allow to cool slightly. Cut in half and scoop out the inside flesh, set aside in a bowl.
3. Heat butter in a large sauce pot. Add onion and celery to pot and cook until tender.
4. Add the broth and baking potato. Bring to a boil. Reduce heat to low and cook until potato is tender. Approximately 15 minutes.
5. Add syrup and reserved sweet potato. Season with pepper if desired.
6. Using an immersion blender, blend soup. Or, you can be like me and pour a little bit at a time into your regular blender, blend until smooth, and transfer to a large bowl, until the whole mix is pureed.
7. Return to pot, add cream, and heat on medium until hot. Season with salt and pepper to taste, if necessary.
This soup is really good with some of those Chinese noodles as a topping. I cant take credit for that idea, that was all my boyfriend who discovered that one. Turns out, he was right!
Enjoy!
Subscribe to:
Posts (Atom)